

































⏱ Read time: 8 min 📊 Difficulty: Beginner 🔧 Time to build: 1 - 2 days 👷 Manpower: 1 person
Somewhere in almost every older British home there's a set of original floorboards hiding under the carpet. They've been there since the house was built, covered up at some point in the 1970s when fitted carpet was the height of aspiration, and entirely forgotten ever since. Pull back the corner of that carpet and there's a reasonable chance that what you find underneath is worth saving.
Floor sanding is one of those DIY projects that looks intimidating but is actually very achievable over a weekend with the right equipment. The results - stripped, smooth, freshly finished wooden boards - are genuinely transformative and the kind of thing that makes guests think you've had a professional in. You haven't. You hired a floor sander, followed a few straightforward steps, and now it looks like new.
This guide covers everything a first-timer needs to know: how to hire a floor sander from HSS DIY, how to use one, what the edge sander is for, how much it costs, and how to get the finish that makes the whole weekend's effort worth it.
At HSS DIY - The Home of Great Projects - you can hire your floor sander and edge sander online 24/7, with next day delivery. 'Buy the materials. Hire the tools. One order. All in one place.'
Why May Is the Right Month to Sand Your Floors
Floor sanding needs ventilation - and lots of it. The dust produced is a health hazard (more on that in the safety section) and the finish needs to cure in a well-aired room. May is the sweet spot: warm enough to have the windows open without turning the room into a wind tunnel, and dry enough that the varnish or oil you apply at the end cures properly rather than blushes in the damp.
Floor varnish and oil finishes cure best at temperatures above 15°C, which May reliably provides across most of the UK. Avoid floor sanding during humid or wet spells if you can - the wood absorbs moisture and the finish can look milky or take much longer to dry properly. The bank holidays and long weekends in May also give you the two days this project realistically needs.

Project at a Glance: What a Well-Planned Floor Sanding Weekend Looks Like
Day 1 - Morning (2-3 hrs)- Preparation: Clear the room, remove all furniture and rugs. Pull out any nails, staples and tacks with a punch or pincers. Secure any loose boards. Cover plug sockets and light switches with masking tape. Open windows for ventilation.
Day 1 - Afternoon (3-4 hrs)- Coarse and Medium Sand: First pass with coarse grit, working along the grain. Vacuum or tack up dust. Second pass with medium grit. The floor should be looking significantly better already - this is the moment you realise the neighbours were right about those floorboards all along.
Day 2 - Morning (2-3 hrs)- Fine Sand and Edges: Final fine grit pass with the drum sander. Hire edge sander to tackle the perimeter the drum can't reach — along skirting boards, into corners, under radiators. Vacuum thoroughly. This step is the reason you hired the edge sander and should not be done on hands and knees with a sheet of sandpaper.
Day 2 - Afternoon (2-3 hrs active + drying): Apply first coat of varnish, oil or wax. Allow to dry according to product instructions. Apply second coat if required. Leave the room well ventilated until fully dry. Admire from the doorway while kettle boils.
First: Is Your Floor Suitable for Sanding?
The drum floor sander is suitable for:
- Solid hardwood floorboards (oak, ash, pine, Douglas fir)
- Softwood floorboards (the most common type in Victorian and Edwardian properties)
- Traditional parquet and wood block flooring
- Most engineered wood flooring (check the veneer thickness - minimum 3-4mm required)
It cannot be used on:
- Laminate flooring
- Vinyl or LVT
- Any floor with underfloor heating pipes close to the surface without adequate protection
Which Machines Do You Need to Hire?
The short answer is both - the drum floor sander for the main floor area and the edge sander for the perimeter. Here's what each does and why you need both.
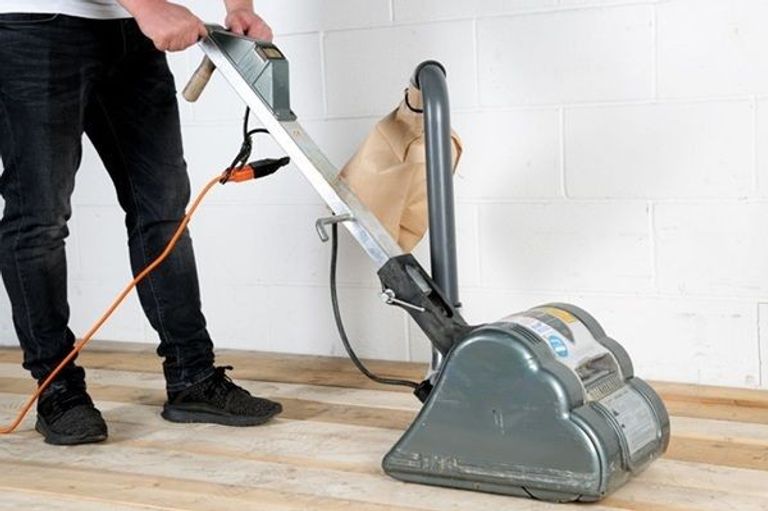
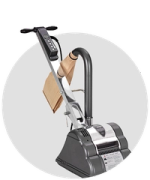
🔄 Drum Floor Sander (Hiretech HT8) | 240V | 8-inch drum | RCD breaker included
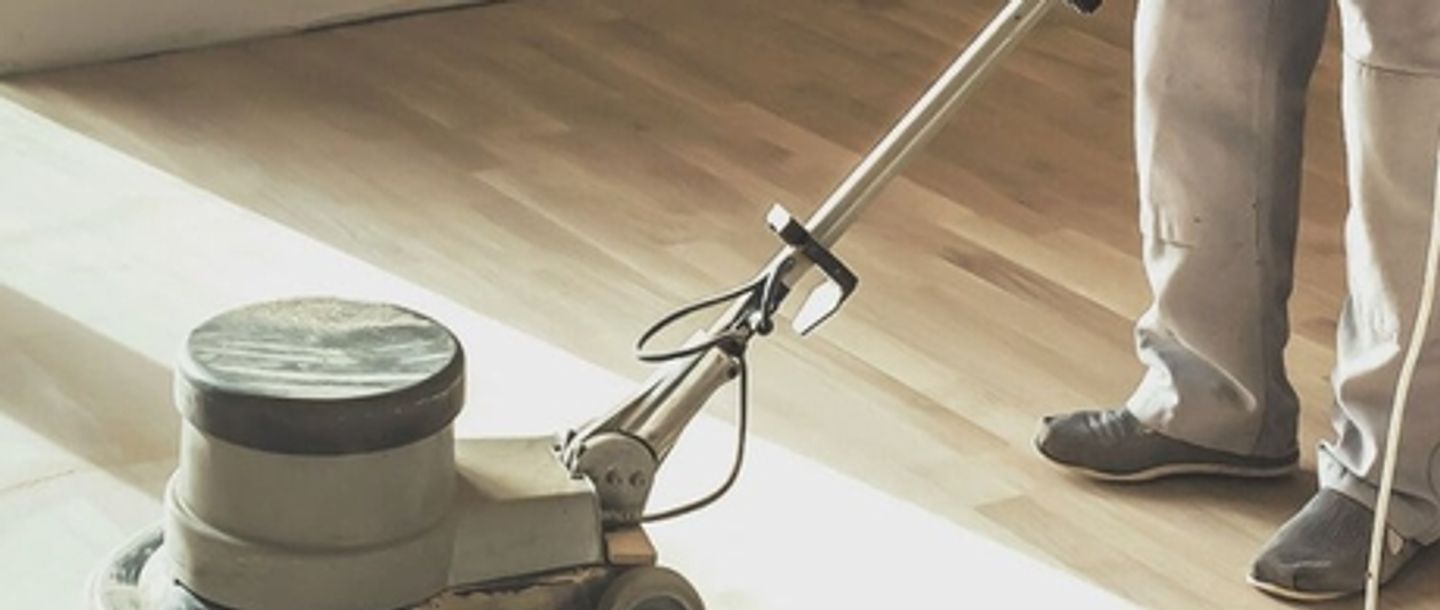
The workhorse for the main floor area. Strips old varnish, paint, stains and surface damage from hardwood and softwood boards. Heavy-duty motor won't stall on coarse grit sheets. Breaks down into three components for transport - fits in an estate car. Must be used with a dust bag (available to add at checkout). Every hire includes an RCD safety breaker as standard.
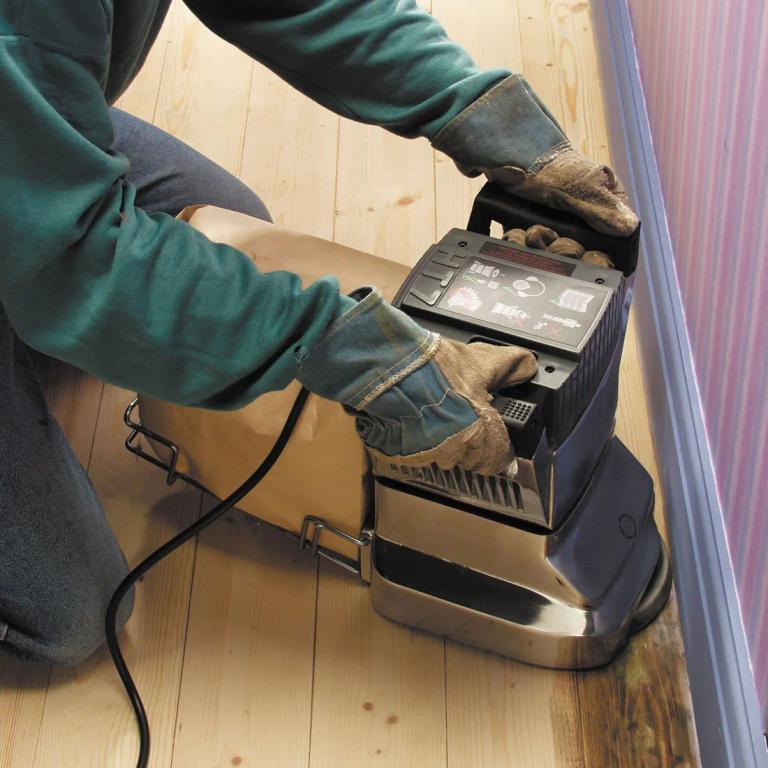
⭕ Floor EdgeSander | 240V | Disc-based | For edges and corners
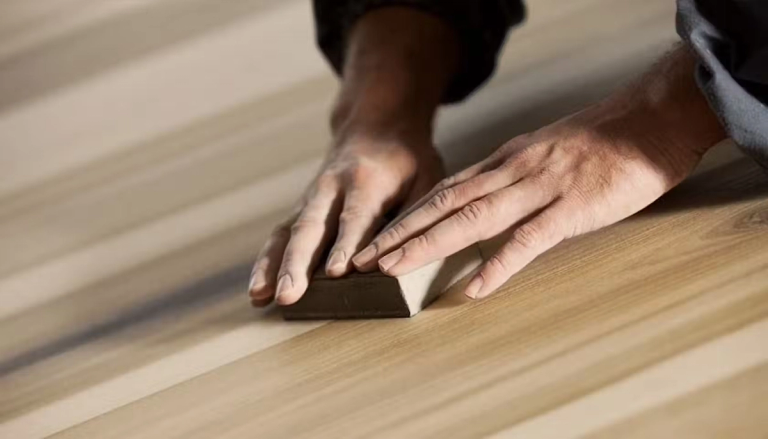
Specifically designed to get right up to the skirting board, into doorways and along the edges the drum sander can't reach. Delivers the same professional-grade result at the perimeter as the drum sander on the main floor. Without the edge sander, you're left with a 10cm strip around the room that needs doing by hand with a sanding block - which is slow and doesn't produce the same finish.
📦 Floor and Edge Sander HirePack | Both machines in one hire booking | Best value
The most cost-effective way to hire both the drum floor sander and edge sander together. Cheaper than hiring each separately. Includes both machines in a single delivery - everything you need to do a complete room in one order. Add your sanding sheets, dust bags and floor finish at checkout.
Hire Floor and Edge Sander Pack
Browse all floor sanding equipment: hss.mom/hire/c/sanding-fixing/floor-sanding-equipment
Understanding Sandpaper Grit - The Bit Most First-Timers Get Wrong
The grit number tells you how coarse or fine the sandpaper is. Low number = coarse, high number = fine. You always work from coarser to finer, never the other way around. Skipping a grit leaves scratches that show through the finish. Spending a few minutes vacuuming between each grit keeps the coarser particles from scratching the work you've already done.
Coarse grit (24 to 40): The heavy lifter. Strips old varnish, paint, thick stains and levels any raised or uneven boards. This is your starting grit if the floor has an existing finish. It removes material fast - which is why you go with the grain and don't linger. HSS recommends at least three sheets per room at this grade.
Medium grit (60 to 80): Smooths out the scratches left by the coarse pass. This is the grit most people skip when they're in a rush, and the reason their 'finished' floor still looks a bit rough. Don't skip it. The floor needs to look good at this stage before you go fine.
Fine grit (100 to 120): The finishing pass. Prepares a silky-smooth surface ready for varnish, oil or wax. The finer the grit, the better the finish absorbs into the wood. By this point the floor should look almost good enough to leave bare.
Full grit selector guide: HSS Guide to Sandpaper Grits
HSS DIY recommends ordering at least 3 sheets per grit per room. Any unused sheets are refunded when you return the hire. Full grit guide: HSS Guide to Floor Sanding
How to Use a Floor Sander - Step by Step
The machine is straightforward once you understand the basic principle: the drum rotates at high speed, the sanding sheet does the work, and you control the depth of cut by slowly lowering and raising the drum as you walk. Here's the method:
- Start with the edge sander first. Sand around the full perimeter of the room before you tackle the main floor. This way, any marks made by the edge sander at the border are removed when the drum sander passes over them. Most beginners do it the other way round and then discover they've left a different-finish border.
- Load the coarse grit sheet. Follow the machine's loading instructions - the HT8 has a straightforward clamp mechanism. Make sure the sheet is tight and properly seated before you start.
- Start with the drum off the floor. Lower the drum gently onto the floor as you begin walking forward. Never start with the drum already in contact with the floor - it will leave a gouge in seconds. Walk at a steady, moderate pace.
- Sand along the grain. Always in the direction of the boards. Never across the grain. If the floor is very uneven, you can do one diagonal pass at 45° first - but this is an exception, not the rule.
- Lift the drum before you stop. At the end of each run, raise the drum off the floor before you stop walking. Stopping with the drum down leaves a mark. You'll do this wrong once and remember forever.
- Work systematically across the room. Overlapping each pass by about a third of the drum width ensures even coverage. Don't rush - the machine does the work, you just guide it.
- Vacuum between grits. Before loading medium grit, vacuum the entire floor. Coarse grit particles left on the floor will scratch the work you're doing with the medium sheet. Take two minutes. Worth it.
- Repeat with medium then fine. Each pass should look noticeably smoother than the last. By the fine grit stage, the floor should look almost ready to finish.
Hire or Buy? Why Hiring a Floor Sander Makes Complete Sense
A professional-grade drum floor sander costs upwards of £500 to buy - and that's a consumer model, not the same quality as a professional hire machine. You'd need to sand a significant number of rooms to justify buying one outright. Hiring a floor sander from HSS DIY gives you a professional-grade Hiretech HT8 for around £42 a day. That's the right calculation for a one-room or even a whole-house project.
⚠️ Safety - Please Read This Before You Start the Machine
Floor sanding produces fine wood dust, which is a genuine health hazard - not just a nuisance. Fine hardwood dust in particular is classified as a carcinogen under UK COSHH regulations. The dust bag significantly reduces the amount of dust produced, but doesn't eliminate it. Here's what to do:
- Dust mask is not optional: wood dust from sanding is classified as a respiratory hazard. Fine hardwood dust in particular is a known carcinogen. Wear an FFP2 dust mask throughout the entire sanding process - not just when the machine is running, but when vacuuming and clearing up too
- Ventilate the room throughout: open every window in the room before you start and keep them open. Never sand in a sealed room. If the room gets visibly dusty despite the dust bag, stop, ventilate, wait for it to settle, then continue
- Safety goggles: the drum sander and edge sander throw fine particles. Eye protection is straightforward to put on and much less straightforward to explain why you didn't
- Ear defenders: the drum floor sander is genuinely loud, sustained exposure above 85dB causes hearing damage. The machine produces over 90dB in normal use. Wear ear defenders for the full duration
- Vibration limits: due to medium vibration risk, the floor sander can be used for up to two hours before reaching the Exposure Limit Value (ELV). Take regular breaks and don't run the machine for extended periods without stopping
- Existing wiring and pipework: if your floorboards are above underfloor pipes or wiring, take care when sanding near visible pipework. The coarse sheets can damage unprotected surfaces
- Keep the dust bag fitted at all times: the floor sander must only be used with a disposable dust bag fitted. Never run it without one - the dust volume without a bag is immediate and significant, and the fire risk from accumulated fine wood dust is real
- RCD protection: the machine runs at 240V and every hire includes an RCD safety breaker as standard. Plug into the RCD before the mains. This is included in your hire — use it
PPE - dust masks, goggles and ear defenders - available to buy at HSS DIY alongside your floor sander hire.
Real Project: Victorian Hallway Floorboards - One Weekend, One First-Timer
The floor: Original Victorian pine floorboards in a hallway, approximately 8m² with two doorways. Painted dark brown, several gaps between boards, one loose section near the front door.
Equipment hired from HSS DIY: Floor and edge sander hire pack (Hiretech HT8 drum sander + edge sander). Coarse, medium and fine sanding sheets ordered alongside the hire - HSS DIY refunded the ones returned unused. Two dust bags.
Day 1: Nails punched below surface, loose board secured with screws, gaps filled with decorator's caulk. Coarse pass stripped the brown paint completely. Medium pass smoothed the scratches. Six hours including a break for lunch and approximately 20 minutes staring at the floor wondering if it was ruined (it wasn't).
Day 2: Fine pass with drum sander, then edge sander along all four sides. One hour of thorough vacuuming. Two coats of water-based floor varnish applied in the afternoon. Floor walkable by evening.
Result: Eight year old boards that looked like new. Total hire and materials cost approximately £130. A professional floor sander quoted £480 for the same job. The floor is still going strong.
Floor Sanding Weekend Checklist
Before you start:
- Floor type confirmed: solid hardwood or softwood floorboards, parquet or wood block only. Laminate, vinyl and LVT cannot be sanded with a drum floor sander
- Nails and fixings dealtwith: all nails punched below the surface, staples and tacks removed. The drum sander will rip a sanding sheet if it catches a protruding nail
- Loose boards fixed: secure any lifting or squeaky boards with screws before you sand. Much harder to fix once the floor is done
- Gaps filled: fill gaps between boards with wood filler, flexible decorator's caulk or sanded sawdust mixed with PVA. Let it dry fully before sanding
- Room cleared: all furniture, rugs, curtains and anything with a fabric surface removed from the room. Dust gets everywhere
- Sockets and switches covered: masking tape over every socket plate, light switch and gap where dust could become trapped
- Sanding sheets ordered: at least 3 sheets per grit (coarse, medium, fine) per room. Order alongside your hire — unused sheets returned for refund
- PPE ready: dust mask (FFP2 minimum), safety goggles, ear defenders — the floor sander is loud
While you're sanding:
- Windows open: ventilate the room throughout — never sand in a sealed room
- Sand with the grain: always along the direction of the boards. Across the grain leaves scratches that show through the finish
- Keepmoving: don't stop or linger in one spot with the drum on the floor — it will create an indent
- Vacuum between each grit: clear all dust before changing to the next grit. Coarse grit dust under a fine grit pass scratches the floor
- Edges last: use the edge sander around the full perimeter after the drum sander passes are complete
Before you finish:
- Final vacuum: tack cloth wipe-down after vacuuming removes any remaining fine dust before applying finish
- Floor finish applied: varnish, oil or wax — follow the product instructions for coats and drying time. Don't rush this step
- Machine cleaned and returned: empty dust bag, wipe down the machine. Return on the agreed hire end date
Those Floorboards Have Been Waiting Long Enough
Floor sanding is genuinely one of the most satisfying DIY projects you can do in a weekend. The before and after difference is dramatic, the process is more straightforward than most people expect, and the result - smooth, clean, freshly finished wooden boards - looks like you spent a lot more money than you actually did.
The equipment is all available from HSS DIY: hire the drum floor sander and edge sander together as a pack, add your sanding sheets and floor finish in the same order, and have it all delivered next day. Two days of work, a floor that looks brand new, and a legitimate sense of having done something properly.
Ready to Give Those Floorboards a Second Life?
Hire your floor sander and edge sander online 24/7, next day delivery. Add your sanding sheets and floor finish in the same order.
Buy the materials. Hire the tools. One order. All in one place.
Get DIY Happy.
Frequently Asked Questions
How much does it cost to hire a floor sander in the UK?
Hiring a drum floor sander from HSS DIY costs from approximately £42 per day. The floor edging sander is available separately, and the floor and edge sander hire pack — which includes both machines in one booking — is the most cost-effective option for a whole room. Sanding sheets are sold separately and start from around £1.30 per sheet, with any unused sheets refunded when you return the hire. Order before midday and both machines can be delivered next day.
How do I use a floor sander as a beginner?
The key principles are: always sand with the grain (along the direction of the boards, not across), keep the machine moving and never let the drum rest stationary on the floor, start with coarse grit and work through medium to fine, and change the sandpaper as soon as it stops cutting efficiently. The HSS DIY blog has a step-by-step floor sanding guide at hss.mom/blog — worth reading the night before you start. The machine also comes with a video guide on the product page.
Do I need to hire an edge sander as well as a floor sander?
Yes, if you want the whole floor done properly. The drum floor sander cannot get close to skirting boards, doorframes or into corners — there's always a border of approximately 10cm around the room that it can't reach. The edge sander is specifically designed for this. Without it, you're left doing the edges by hand with a sanding block, which takes a long time and doesn't produce the same result. Hiring both together as the hire pack is cheaper than booking them separately.
What type of wooden floor can I sand with a hired floor sander?
The HSS DIY drum floor sander works on solid hardwood and softwood floorboards, traditional parquet and wood block flooring, and most engineered wood flooring. It cannot be used on laminate, vinyl or LVT floors — these have a surface layer that's too thin to sand and will be destroyed by the drum. If you're not sure whether your floor is solid wood or engineered, check the edge of a board at a doorway — solid wood will be the same material all the way through; engineered wood will have a thin wood layer on top of a plywood core.
Why is May a good time to sand floors?
A couple of good reasons. Firstly, May is a good time to have the windows open for extended ventilation — which is a requirement for floor sanding, not a preference. Sanding in a sealed room in winter with the heating on is not ideal. Secondly, floor varnish and oil cures best at stable temperatures above 15°C, which May reliably provides across most of the UK. Avoid sanding during very humid or wet weather if you can — the wood absorbs moisture and the finish can take longer to dry and may look milky.
How do I get the floor ready before I hire a floor sander?
Three things matter before you start the machine: pull or punch down all nails, staples and fixings so nothing protrudes above the surface (a protruding nail will tear a sanding sheet and potentially damage the machine), secure any loose boards with screws, and fill large gaps between boards with wood filler or flexible caulk. Let any filler dry fully before sanding. Remove all furniture, rugs and anything fabric from the room — fine wood dust settles on everything.
Useful External Sources
HSS DIY Blog — The Complete Guide to Floor Sanding: hss.mom/blog/flooring/hss-guide-floor-sanding — HSS DIY's own step-by-step guide covering preparation, grit selection, technique and finishing. Read this before you start.
HSE — Wood Dust Health Hazards: hse.gov.uk/woodworking/dust.htm — Official UK regulatory guidance on wood dust exposure, including the health risks of hardwood dust and required protective measures.
Historic England — Guidance on Original Floorboards: historicengland.org.uk — Relevant for period properties with original Victorian or Edwardian floorboards. Advice on preserving historic timber flooring where it has heritage value.
HSS DIY YouTube: youtube.com/@HSSDIY — Video guides for floor sanding and edging. The floor sander product page also includes a how-to video.
HSE — Safe Use of Mitre Saws: hse.gov.uk/woodworking — Regulatory guidance on safe operation of crosscut and mitre saws including safe guarding requirements and operator technique.
HSS DIY YouTube: youtube.com/@HSSDIY — Project guides and how-to content from The Home of Great Projects.
Prices shown are indicative hire and buy rates as of 15 May 2026 and subject to change. Always check hss.mom for current pricing. HSS ProService Ltd.
Meet the people behind our Tips & Advice
From quick fixes to bigger DIY projects, get to know the people behind the guides helping you get the job done with confidence.