

































⏱ Read time: 5 min 📊 Difficulty: Beginner 🔧 Time: Before each sanding pass 👷 Manpower: 1 person
The most common mistake in floor sanding isn't the technique - it's the grit. People either start too fine and spend twice as long removing the old finish, or skip the medium pass and wonder why their floor looks scratched under varnish. Getting the grit sequence right is the difference between a professional-looking result and a 'we tried our best' result.
This guide gives you the full sequence, the right grits for each stage, and how many sheets to order for a typical room.
What Does Grit Number Mean?
Lower number = coarser, more aggressive. Higher number = finer, smoother result.
A 36 grit sheet has large abrasive particles that cut through wood and old finishes quickly. A 120 grit sheet has tiny particles that create a smooth, almost polished surface. You always go from low to high - coarse to fine - removing old material first, then smoothing the surface at each subsequent stage.
Going straight to a fine grit on a floor with old varnish doesn't save time. It clogs the sheet in minutes and removes almost nothing. Start coarse, work up.
The Three-Pass Grit System - This Is What Works
Step 1 - Coarse (36-40 grit): This is the worker. Strips old varnish, paint, stains and top layers of the wood. It's aggressive - and that's the point. You want it to remove material efficiently. Keep the machine moving at all times and work along the grain. Vacuum up all the coarse dust before the next step.
Step 2 - Medium (60-80 grit): This is the step most impatient first-timers skip, and it's the reason some DIY sanded floors look a bit rough even after varnishing. The coarse pass leaves visible scratch marks in the wood. The medium pass removes them. The floor should look noticeably smoother and more consistent after this pass. If it doesn't, do it again.
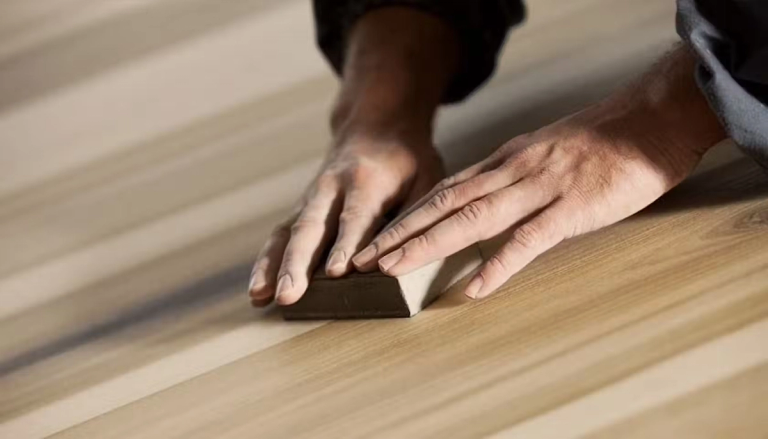
Step 3 - Fine (100-120 grit): The finishing pass. The wood should feel almost silky at this point - run your hand along the grain and it should catch on almost nothing. This is the surface your varnish, oil or wax will soak into or bond to. A rough fine-grit pass produces an uneven finish. Take your time here.
How Many Sheets Do I Need?
HSS DIY recommendation: order at least 3 sheets per grit per room.
For a standard bedroom or living room (approximately 15-20m²), order three coarse, three medium and three fine sheets as a minimum. A larger room or a floor with heavy varnish may need more coarse sheets - old finishes clog sheets quickly.
The good news: any unused sheets you return with the hire equipment are refunded by HSS DIY. So order more than you think you need — you won't lose money on the surplus, and running out of coarse grit halfway through the first pass is genuinely annoying.
Add sanding sheets to your hire order at checkout: hss.mom/hire/c/sanding-fixing/floor-sanding-equipment
When to Change the Sheet
A sanding sheet that's done its job starts to feel different from one that's still cutting. If the machine is making a lot of noise but not removing much material - if you look back at the pass and the surface doesn't look noticeably different from before - change the sheet.
Signs a sheet needs changing: visible clogging with dust and old finish (the sheet looks dark and gunky), the floor feels warm where the sheet has been running, or you're making multiple passes over the same area and nothing is happening. Fresh sheets are cheap. Time spent fighting a dead sheet is not.
Edge Sander Grits - A Common Mistake
The edge sander uses a disc rather than a belt, and applies pressure in a concentrated circular pattern. This means it cuts faster than you might expect at a given grit. Many first-timers use the same grit on the edge sander as on the drum sander and find the edge sander marks are more noticeable.
Rule of thumb: start one grit finer on the edge sander than on the drum for each pass. If the drum is on 36 grit, use 40-60 on the edge sander. If the drum is on fine (120), use 100 on the edges. This avoids the edge sander cutting deeper than the drum and leaving a visible border around the room.
The Machines - Book at HSS DIY
🔄Drum Floor Sander (Hiretech HT8)|240V | From ~£42/day
The main floor workhorse. Sanding sheets sold separately and refunded if unused. RCD breaker included. Dust bag required - add at checkout.
⭕Floor Edge Sander|240V | Add to same order
Disc-based. Match grits carefully to the drum for a consistent finish across the whole floor.
📦Floor and Edge Sander Hire Pack|Both machines | Best value
Hire both together at a combined rate. Add your graded sanding sheets at checkout.
Frequently Asked Questions
Can I use any brand of sanding sheet in the HSS DIY floor sander?
The drum floor sander takes a specific sheet size and format designed for the Hiretech HT8. HSS DIY stocks compatible sheets in all three grits - add them to your hire order at checkout. The sheets are refunded if unused when you return the machine, so order generously. Using incompatible sheets can damage the drum clamp and create uneven results.
What happens if I start with too fine a grit on an old floor?
The sheet clogs up very quickly with the old varnish or paint - you'll see it turn dark and gunky within a few passes. Fine grit abrasive isn't aggressive enough to cut through a finish; it just smears it around and clogs. Start coarse even if the floor doesn't look that bad. It's always faster than spending three times as long fighting with the wrong grit.
Do I need to sand in a different direction for different grits?
For most domestic floor sanding, you sand along the grain (the direction of the boards) for all three grits. The exception is a very uneven floor with significant height differences between boards - in this case you can do the first coarse pass diagonally at 45° to help level the boards, then switch to along-the-grain for medium and fine. Always finish with a fine grit pass along the grain regardless of what you've done before.
Right Grit, Right Sequence, Right Result
The grit guide isn't complicated once you see it laid out. Coarse removes the old finish. Medium smooths the coarse scratches. Fine prepares the wood for its new finish. Don't skip the middle step. Refund the leftover sheets when you return the hire.
Ready to Get Started?
Hire your floor sander and edge sander at hss.mom - online 24/7, next day delivery. Add your sanding sheets, dust bags and floor finish in the same order.
Buy the materials. Hire the tools. One order. All in one place.
Get DIY Happy.
Prices shown are indicative hire and buy rates as of 15 May 2026 and subject to change. Always check hss.mom for current pricing. HSS ProService Ltd.